Gingersnaps

Recipes

This recipe goes back to 2010.  I keep playing with the recipe and have yet to meet a gingersnap I don’t like.  In fact, they don’t always snap.  I’m more of a fan of gingerchews.  The most recent batch disappeared before I got the camera out.

2 1/2 tablespoons ground flaxseeds
3 tablespoons water

3/4 Cup vegetable oil
3/4 Cup maple sugar
1/4 Cup organic sugar
1/4 Cup agave nectar

2 cups flour
2 teaspoon baking soda
1/4 teaspoon salt
1 teaspoon ginger, powdered. or fresh ginger, to taste
1 teaspoon cinnamon, powdered
1/2 teaspoon cloves, powdered

1/3 Cup granulated sugar (to roll dough in)
You can make these cookies in one bowl if you’re careful.  Add water to ground flax in large bowl.  Mix using a whisk or fork. It will become very gooey and gelatinous.  Add vegetable oil, sugars, and agave nectar.  Mix well.

If you are careful, you can add all the dry ingredients on top and gradually stir them in. (Doing it this way
prevents you from getting another bowl dirty, but you have to be careful about mixing thoroughly.  You may wish to combine the dry ingredients separately and add them to the wet ingredients gradually.)

Work dough into a ball and refrigerate it covered in the bowl overnight.  You can cut this time down to 2 hours if you’re feeling impatient.  Form balls of dough (I did walnut-sized), roll in granulated sugar, place on ungreased baking sheet, and press down only enough so that they don’t roll around on the tray (you don’t need to flatten them–they flatten in the oven).  Bake in an oven preheated to 350F for about 8 minutes or until crinkly and golden brown around edges.  If you cool them on a hard surface, they will be chewier, cooling on a wire rack makes for a crispier cookie.  When they are cooled, if you store them in an airtight container, they’ll be crispier, or put them in a regular cookie jar for chewy cookies.  They freeze well.  So well, in fact, that they disappeared before I got around to getting the camera out.  Better luck next time.

I’ve played around with amounts of sugars and oils as well as amounts of spices.  I think the spices can be increased by quite a bit to suit your taste and sugars and oils can be decreased.  They are good with ground cardamom if you have it.  The recipe as shown above produces cookies that spread out quite a bit.  In fact, they ran into each other on the sheet during baking.

French Toast

Recipes

This entry could also be titled, “What to Do with Undercooked Bread,” but this recipe would be great with just about any type of bread.  It is definitely a special event kind of food–a good choice for weekend brunches.  Before I get to the recipe, let me back up and and explain the undercooked sourdough.

Since April, I’ve had some stellar sourdough starter going. I’ve made sourdough starter in the past and it’s never been very vigorous. This stuff is different. I got some free starter from Carl’s Friends (just had to send in a self-addressed, stamped envelope) and it’s been bubbling away ever since.
I’ve made some kind of sourdough bread product approximately once a week. We’re talking pizza dough, injera, sourdough boules, Berkeley sourdough loaves (my favorite keep-on-hand-all-the-time-because-it’s-awesome bread), and I just pulled out some sourdough bahn mi-inspired loaves from the oven. I haven’t posted about this before because I’ve been following other people’s recipes relatively closely and haven’t gotten around to jotting down the changes and pointers that I would make for my own recipe.
But I have been experimenting. I have baked loves in a perforated French bread pan like this one, standard loaf pans, and on a cookie sheet. On the last batch before the bahn mi, I did one loaf on a sheet and one loaf in a loaf pan. We ate the one off the sheet first and saved the loaf in the pan on the counter. When we cut into the second one, we discovered that it was not fully baked along the bottom middle and there was quite a large cavity inside. I decided it would be destined for French toast, which would cook the uncooked part.
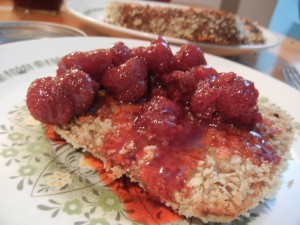
Bread cooked this way will be essentially steamed, a texture that made my sweetie pie think it was still uncooked. I liked it, but I’m a big fan of steamed bread. If you need to rescue your undercooked bread by making French toast and you’ve got very dense bread, I’d suggest slicing it thinly. Here’s how I did it. Strawberry spoon fruit optional. I’d do it on purpose again, for a special treat and since it made so much, I’ll be able to see how it does reheated from frozen.


Coating Ingredients
1 banana
¾ cup hemp milk (or unsweetened milk of your choice)
1 teaspoon cake seasoning
1 teaspoon vanilla
1 tablespoon agave nectar
1 tablespoon flax seeds (doesn’t matter if it’s ground or whole because it’s going in the blender)

Other Ingredients
1 loaf of bread, thinly sliced
2 cups panko crumbs (or as needed)
Oil to coat frying pan.

Optional
Strawberry spoon fruit or other toppings

Blend coating ingredients until smooth. Put enough oil in large flat-bottomed frying pan to coat bottom. Preheat over medium high. Pour some of coating into shallow bowl, replenish as needed. Pour enough panko crumbs into another shallow bowl to cover bottom of bowl, replenish as needed. Dip one slice of bread at a time into coating, flip and make sure it’s covered, let sit about 30 seconds. Remove from coating bowl, let excess drip off, transfer to other bowl and coat with panko. Transfer to large clean plate. Once you have four slices (or however many will fit in your pan) ready, carefully place them in preheated pan. Cook with lid on for 4 minutes per side (or until golden brown). On final side, cook an additional 2 minutes with lid off. Cooking with lid on may not be necessary if you’re not trying to steam undercooked bread.  Serve topped with strawberry spoon fruit.

Coconut Chocolate Ice Cream

Recipes

One of my sweetie pie’s favorite sayings when it comes to vegan food is, “just because it’s vegan, doesn’t mean it’s healthy.” Here’s an example of vegan “junk food” that is mighty tasty.  On the upside, I can easily pronounce all the ingredients in this recipe, so it’s not junk in that sense.

Just out of curiosity, I calculated how much it costs to make this recipe. Turns out it’s about $7.50 for this amount, which I think is about 1.5 quarts, so about $5 per quart, $2.50 per pint. Next time I make it, I’ll be sure to weigh the final product. I used non-organic vanilla extract, but otherwise, it’s all organic. It does take some planning ahead so I have a feeling the organic vegan coconut soft serve at our co-op will still win out occasionally because of the convenience factor, but I like the taste of mine better than the chocolate soft serve at the co-op. Maybe I’ll need to try making plain vanilla sometime so I can do a swirl and perhaps a taste-off.

Ingredients

27 oz. coconut milk (2 cans)
1 cup sugar
½ cup cocoa powder
Pinch salt
1 teaspoon vanilla

If you use an ice cream freezer with a freezable base, it’s a good idea to put your ice cream freezer bowl into the freezer the day before you plan to make ice cream. I know it says it can be ready in 4 hours, but letting it go longer will ensure it’s thoroughly chilled. It doesn’t hurt to let the ice cream base chill for 24 hours in the fridge, either.

Whisk coconut milk, sugar, cocoa powder, and salt together in saucepan over medium heat. Cook about 10 minutes or until it thickens slightly. Remove from heat, add vanilla, and transfer to a glass container to cool. When it reaches room temperature, put in fridge and wait until it’s well chilled. If using a bowl, place plastic wrap directly on surface of base to prevent skin from forming.

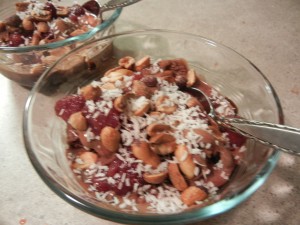
When base is sufficiently cooled, prepare according to ice cream maker directions. It took 30 minutes in mine for melty soft serve consistency and I seasoned it for 2 hours in the freezer until it reached good scooping consistency.  In the picture above, it has fresh roasted peanuts, strawberry spoon fruit, homemade chocolate syrup and coconut flakes.

Ultimate Lasagna

Recipes

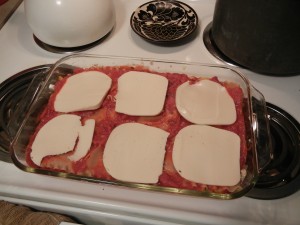
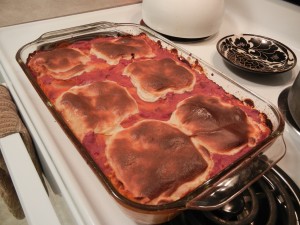
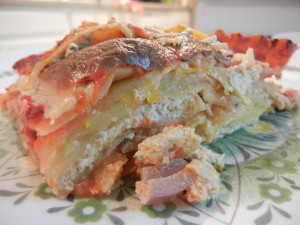
I was pretty excited about trying Daiya wedges. They taste pretty awesome. For your viewing pleasure, I took pictures of the lasagna before and after it was baked to show off the lovely way it browns. I used some squash from my CSA but you can easily adapt this recipe to whatever is in season.

Ingredients
9 whole wheat lasagna noodles cooked to al-dente (or use the kind that is ready to bake)

8 oz hemp ricotta
1/3 cup nutritional yeast
1 half onion, diced
4 cloves garlic, sliced or minced, depending on your preference
1 Tablespoon Italian Seasoning mix
Pepper to taste
Salt to taste

3 large pattypan squash, thinly sliced (easy to do in food processor)
Olive oil

28 oz. crushed tomatoes
1 package jack style Daiya wedge

Preheat oven to 350°F.

Sauté the squash in olive oil. Add salt to help squash release water. The goal here is to reduce water content in squash so it doesn’t make your lasagna soggy.

While the squash is cooking, mix ricotta, yeast, onion, garlic and seasonings in small bowl. Set aside.

Put a layer of crushed tomatoes in the bottom of a 9 X13” casserole, enough to thinly coat the bottom. Put the first three noodles on the tomatoes and layer with half of the ricotta stuffing. Add a layer of cooked squash (half of the total squash) and top with tomatoes. Add second layer of noodles, the rest of the ricotta and squash, and some tomatoes. Top with final layer of noodles, last of the tomatoes, and slices of Daiya. Bake until Daiya melts and browns, about 45 minutes. Remove from oven and let sit 10 minutes to allow cool slightly.

Coconut Mini Bundt Cakes

Recipes

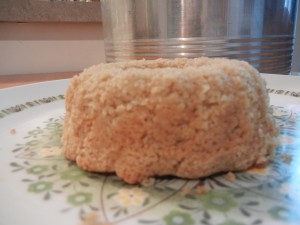
This is a moist pound cake recipe with a light coconut taste.  It would be good frosted with chocolate or vanilla frosting and freezes well.  It’s moist enough to enjoy plain or accompanied by fruit.  You might like to try adding a half cup shredded coconut as an add-in if you have it around.

Ingredients

1 cup hemp milk (or milk of your choice)
1 can coconut milk
5 oz unrefined coconut oil
2 tablespoons vanilla
3 cups whole wheat pastry flour
2 cups sugar
1 teaspoon salt
3 ½ teaspoons baking powder

Preheat oven to 350°F. Grease Bundt pan, mini Bundt pans, or muffin tins and set aside.  Mix wet ingredients until smooth.  Add dry ingredients and mix until few lumps remain.  Pour into greased pan or pans.   Cake will rise during baking so do not fill pans to top unless you want puffy cupcakes.  Bake in preheated oven until brown around edges—timing varies depending on pan.  Large Bundt pan will take at about 60 minutes.  Mini pans and regular-sized muffins will take about 25 minutes.  Cake is easiest to remove from pan when slightly cooled.  For larger cakes, do the inversion method.  Cool in pan inverted on plate, give a few taps, and release cake to pan.  For large or small cakes, you may need to run knife around edges to help cake release.

Simple Harissa Hummus

Recipes, Uncategorized

If you start with Harissa olive oil like I got in the June Vegan Food Swap, this recipe comes together quickly.  If you don’t happen to have harissa olive oil around, use regular olive oil.  If you want spicy hummus, you will need to add pepper flakes, chili powder, or some such.  If you add something that’s not in powder or oil form, add it with the garlic.  For added flavor, top with smoked paprika when you serve.  I thought I would have a picture of this but it ended up disappearing before I got the camera out.  Stay tuned–I’ll post a picture the next time I make it.

Ingredients

2 cloves garlic
2 cups chick peas
½ cup tahini
3 tablespoons lemon juice
½ cup water (or to taste, depending on what consistency hummus you like)
Salt, to taste (start with a small pinch)
¼ cup Harissa Olive Oil

Process garlic in food processor until the pieces are all stuck to the processor bowl.  Add chick peas and process until they become uniformly grainy.  Add all other ingredients except olive oil.  Process until it doesn’t get any smoother.  Slowly pour oil into running processor.  Put into refrigerator for flavors to meld and, if you desire, top with smoked paprika and additional olive oil before serving.  I like this with plain whole wheat tortilla chips.

Open-Faced Radish Sandwiches with Zippy Spread

Recipes

This recipe features radishes from our CSA.  It’s kinda hard to stop eating these pretty little bits of yum.  This recipe makes enough spread to make sandwiches for two and have some spread left over.  It’s a good idea to make the spread ahead of time, but it will still taste good if you make it to use immediately.

First, make the Zippy Spread

1/2 cup room-temperature butter substitute
1 garlic clove, minced or pressed
1 green onion, finely chopped
3 tablespoons finely chopped fresh tarragon or 3 teaspoons dried
lemon juice and zest from one lemon
salt, to taste
freshly ground black pepper

Mash ingredients together and allow to sit in the fridge for as long as you can stand it.  30 minutes will do, but the longer, the better.  This time allows the flavors to come together.

Sandwiches

One small bunch radishes
8 slices sourdough bread mini loaf (or whatever bread you have around)
Zippy Spread (you will have leftover spread)

Clean and thinly slice the radishes.  A food processor comes in handy for the slicing.  If they have leaves, trim those off and set aside.   Spread the Zippy Spread on bread and top with radishes.  You can put the radish leaves on as well, if you have them.

Korean-Inspired Cold Noodle Salad

Recipes

I’ve been on a fit of trying to use things up lately.  Today’s target was some CSA produce and buckwheat noodles.  I made this awesome noodle salad which was just perfect for the current heat wave.  Serves 2.

Noodles

200 grams thin buckwheet noodles
1/2 teaspoon salt

Vegetables
1 medium cucumber, sliced
1 carrot, diced
a handful of radishes, sliced
1 green onion, sliced

Dressing

2 tablespoons sesame oil
2 tablespoons rice vinegar
1 tablespoon soy sauce
1 teaspoon sugar
1 clove garlic, minced
crushed red pepper flakes, to taste

Toppings

Sesame seeds
sriracha sauce
hoisin sauce (make sure it’s vegan)

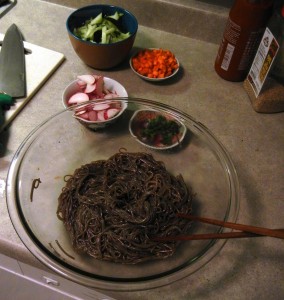
Put water to boil in medium pan.  In meantime, prepare all vegetables.  If you’d like to make this a complete meal, consider adding tempeh.  In a large glass bowl, mix dressing ingredients until sugar dissolves.

In the meantime, add noodles to boiling water with 1/2 teaspoon salt.  Cook 4-5 minutes.  Drain noodles and rinse with cold water, stiring thoroughly so noodles don’t stick.

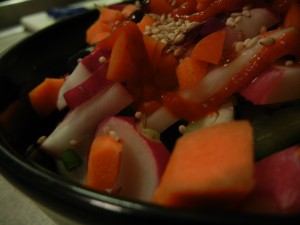
Add cooked noodles to dressing, toss.  Serve into bowls, top with vegetables and other toppings to taste.  Makes for good make-your-own dinner.


Chewy Trail Mix Granola Disks

Recipes

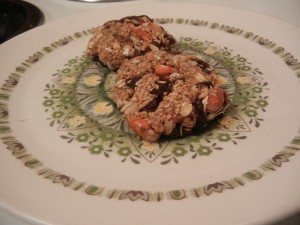
I made this recipe as a veganized (and soy free) version of the Kashi TLC Trail Mix Granola Bar.  While they turned out pretty tasty, I couldn’t achieve bar shape.  In the next version, I will try increasing the syrup mixture.  The dry ingredients are pretty flexible.


Dry Ingredients
1 1/3 cups rolled oats
1 cup almonds
1 cup raisins (or 1/2 cup raisins and 1/2 cup cranberries)
1/2 cup raw sunflower seeds
1/2 cup sesame seeds
1/4 cup rice protein powder
Syrup
1/2 cup brown rice syrup
1/4 cup sugar
1 tsp vanilla extract
1/2 tsp salt
If you have rock-hard raisins, boil some water and add the raisins you will use to the water.  Let steep until they plump up, strain and use as normal. Mix dry ingredients in large bowl and set aside.
In a medium saucepan over medium heat, stir sugar and rice syrup. Stirring constantly until mixture starts to thicken, about 3 minutes.
Add syrup to dry ingredients and mix quickly until the dry ingredients are evenly coated.  Portion into walnut-sized balls, and squash between sheets of parchment paper.  You can also form these into whatever shapes you’d like.  Store in an airtight container.

Strawberry Scones

Recipes

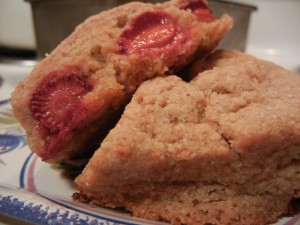
This recipe is eganized from the Cook’s Illustrated Cookbook.  I wanted to make a treat after coming home from picking strawberries.  I had made vegan scones following that recipe once before and they turned out pretty scrumptious.  Now I’m writing down what I did.  These are made with 100% whole wheat pastry flour which is local, too.  Double the recipe if you want plenty to freeze.

8 tablespoons coconut oil

7.5 ounces strawberries

1/2 cup hemp milk

1/2 cup soured rice quinoa milk*

2 cups whole wheat pastry flour

1/2 cup sugar

2 teaspoons baking powder

1/4 teaspoon baking soda

1/2 teaspoon salt


Optional:

1 tablespoon sugar

1 tablespoon melted coconut oil


Scoop the 8 tablespoons coconut oil out onto tray that will fit in your freezer.  Once it has frozen, chop it into small flakes with a knife and return to freezer.  Also put the cleaned and washed strawberries into the freezer.  Mix milks together in small bowl or large measuring cup and put in fridge.

Make sure your oven rack is in the middle and preheat to 425°.  Prepare baking sheet with parchment paper.

Mix dry ingredients in a medium bowl.  Add the frozen coconut oil to the mixture and mix until dry mixture coats oil flakes.  Add milk mixture and stir until combined.  Turn out onto floured surface and knead a few times.  It should hold together in a ragged ball.

Roll the dough into a square and fold into thirds, like a letter.  You may need to use a scraper or spatula if it sticks.  Put the dough on a plate and put in freezer for 5 minutes.

Bring the chilled dough back to the counter and roll out into a foot square.  Sprinkle berries over dough and press down slightly to embed them into the dough.  Roll the dough up so that it forms a tight, strawberry-studded log.  Use your scraper again if needed.  Flatten the log so it’s about 4 inches wide and cut scones.  If you cut it crosswise into 4 equal rectangles, you can cut each triangle regularly to form 2 triangles or cut each rectangle into 4 smaller triangles.  I made mini scones so they last longer.  Transfer to prepared baking sheet.

If you’d like, brush tops with melted coconut oil and dust with sugar.  Bake until tops and bottoms are golden brown, 18-25 minutes for regular sized and maybe 10 or so for mini.  Transfer to a wire rack and let cool for at least 10 minutes if you can stand it.

You can make these ahead and refrigerate them on the baking tray overnight or freeze them at that stage for up to a month.  If they’re frozen, don’t thaw, heat the oven to 375° and cook longer.  25-30 for regular and shorter for minis.

*If you don’t just happen to have this hanging around in your fridge, use your favorite vegan sour cream substitute.