Simple Pesto

Basics, Recipes

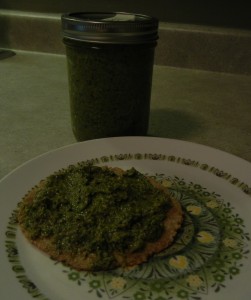
When I can get my hands on lots of good basil, I like to make a big batch of pesto to keep on hand.  As long as you don’t mind brown or make sure to keep the air out, pesto keeps just fine and works well on sandwiches or to make a quick meal with pasta.  This rich pesto is shown here on a homemade tortilla. It’s also good on fingers.

Ingredients
1/2 cup walnuts (or whatever seed or nut you have on hand)
10 cloves garlic
3 small bunches fresh basil or about 5 cups. I use the stems, too, if they aren’t too woody
1 teaspoon salt
1 teaspoon freshly ground black pepper
1 cup nutritional yeast
1/2 cup olive oil
1/2 cup hemp seed oil

Measure your oils into the same measuring cup, set aside.  Add all other ingredients to food processor and process until paste forms.  You may need to help it along, but it seems quickest to just put it all in at once instead of chopping things up separately.  Slowly drizzle oil into processor bowl while processor is running.  Use immediately or pack the pesto into a jar.  You can store this in the freezer or fridge, but either  way, if you don’t want a small layer of brown pesto (which seems to me to just be an aesthetic thing), make an air barrier with either plastic wrap (press it right into the pesto) or oil.  If you’re freezing it, you could even get fancy and freeze it in an ice cube tray and then remove the pesto cubes to a bag once they are frozen.

Yum-Worthy Oatmeal

Basics, Recipes

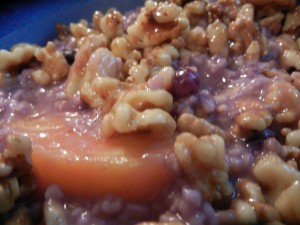
If you have a little extra time for cooking breakfast, this oatmeal is really worth it. This recipe serves 2.

Ingredients
1 1/2 cups water
1/2 cup milk of your choice (I used homemade rice)
1/2 tablespoon oil (I used coconut)
1/2 cup steel-cut oats
pinch salt

Optional:
Fruit and nuts of your choice
Maple syrup, to taste

Put wet ingredients in large measuirng cup or other suitable container.  Microwave on high until they begin to bubble but do not boil.  While this is microwaving, add oil to skillet over medium heat.  Stir in oats and keep stirring until golden, about 2 minutes.    Carefully pour warm liquid mixture into skillet with oats.  Bring to simmer and let cook until oatmeal thickens, about 20 minutes.  Add salt.  At this point, you will want to stir with a chopstick or spoon handle.  Keep stiring this way every few minutes until the oatmeal reaches the consistency of pudding (or whatever consisitency you’d prefer).  This should take no more than 10 minutes.  Remove from heat and let sit for 5 minutes before serving.

Adding frozen fruits will help cool it down to a temperature suitable for eating.

No Worries Rhubarb Pie

Recipes

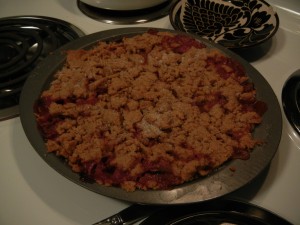
Sometimes pie crust can be finicky.  When you’re trying to speed things along for maximum oven efficiency, it doesn’t seem worth it to get things perfect.  Both layers of crust stuck to the parchment paper when I was rolling them out.  No worries! Scrape it off and push it into the pie tin for the bottom crust.  For the top, crumble it over the top and sprinkle with pretty sugar.  This is a veganized version of rhubarb cream pie.  The misleading name just means the filling is extra thick and gooey, traditionally accomplished by the addition of an egg.


This recipe uses my old standby, Oil Pastry Crust.  You’ll need to make one recipe’s worth of that.  If you have it, add a little lemon peel to the flour for a little extra zing in your crust.


Filling Ingredients


2 bunches rhubarb, or enough to pile high in your pie pan once cleaned and chopped
about 1 cup sugar, to taste
1 tablespoon ground flax seed
1 tablespoon rice syrup
2 tablespoons flour
1 t freshly ground nutmeg
splash lemon juice or milk of your choice
(optional) a couple tablespoons of your favorite butter substitute


Preheat oven to 350° F.  In a large bowl, mix sugar, flax, rice syrup, flour, nutmeg and liquid until uniform.  Chop rhubarb and put into bowl with other filling ingredients.  Toss to coat.  Pour this mixture into bottom pie shell. It should be piled above the edge of the tin.   Dot rhubarb with butter substitute if using.  Cover with top layer of crust.  Poke holes in crust.  Put pie on rimmed cookie sheet to catch any overflow.  Bake in preheated oven for about an hour or until the crust looks done and you can smell rhubarb goodness.  You may need to cover with foil to prevent the crust from browning.  If you can stand it, let cool slightly before serving to let it set up a little.


Use-It-Up Carob Brownies

Recipes

This recipe was inspired by my search for delicious vegan brownies and my desire to finally use up the carob powder I’ve had in my fridge for way too long.  Due to having various other odds and ends in my fridge, this turned out to be a rather elective recipe.  Never fear, it tastes spectacular.  I like the slight caramel taste carob powder lends to this treat.  I can’t wait to try this with cocoa powder to continue striving for that ultimate brownie experience.

Ingredients

½ cup cooked black beans
½ cup cooked garbanzo beans
¼ cup raw almonds
¼ cup hemp seeds
2 tablespoons ground flax seeds
½ cup sugar
1 cup carob powder
¼ teaspoon salt
½ cup vegetable oil
½ tablespoon vanilla extract
½ cup brewed coffee (less if you used a wet sugar)

Let oven warm up to 325° F.  Prepare a 9×9” baking pan with oil and set aside.

Add beans, nuts and seeds to food processor.  Process until a paste forms.  Add the rest of the dry ingredients and process until uniform.  Add wet ingredients and process until smooth; don’t be afraid to let it go awhile.  Pour into prepared pan and put in oven.  Cook until it doesn’t jiggle and a toothpick inserted into the center comes out with only crumbs (and not raw batter), about 35 minutes.

Remove from oven and if you can stand it, let it sit for a day or so to let the flavors develop.

Oat Chai Cookies

Recipes

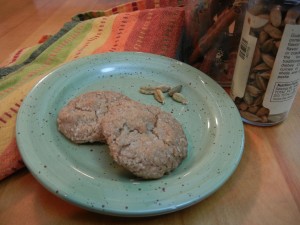
This recipe uses oatmeal and whole wheat pastry flour for a cookie that’s chewy on the inside and crispy on the outside.  The next time I make these, I am going to increase the spices and also experiment with not using a mortar and pestle on the whole chai spices to save a step.


Yields 36 cookies (plus raw dough to devour sample)


Ingredients

Oil, for greasing cookie sheet


Spices

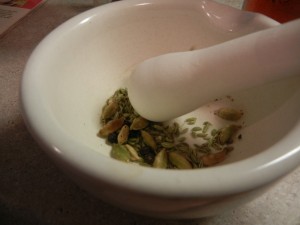
10 whole cardamom pods (crush enough so that seeds fall out and remove pods)

1 teaspoon whole fennel seeds

5 whole black peppercorns

1 teaspoon ground cinnamon

1 small knob of ginger, grated (I found out this is optional, since adding it slipped my mind this time around)


Wet

1 cup maple sugar granules (or unrefined dry sugar of your choice)

¼ cup maple syrup

150 g coconut oil (about 2/3 to ¾ cup)

1 teaspoon vanilla

1 tablespoon ground flax

3 tablespoons black tea or water


Dry

1 cup steel cut oats (uncooked)

1 ¼ cup whole wheat pastry flour

1 teaspoon baking soda

¼ teaspoon salt


Preheat oven to 375°F and grease two large cookie sheets.  Get your cooling racks ready for when the hot cookies come out of the oven.


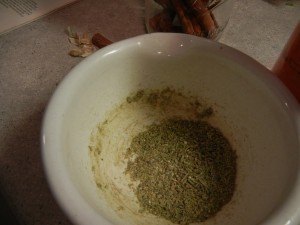
Grind spices with mortar and pestle (this step may not be necessary if you are processing your own oat flour).  Add steel cut oats to food processor, add spices, and process until it looks like flour.  This may take a while.  Add pastry flour and the rest of the dry ingredients and pulse to combine.


Prepare egg substitute by adding boiling water (or hot tea) to ground flax, mixing and letting stand.


Whip together sugar and syrup with coconut oil and vanilla until smooth.  Add egg substitute and mix until smooth again.  Gradually add dry ingredients.  Roll into two-teaspoon-sized balls, place on greased cookie sheet, and bake.  It didn’t seem to make a different whether or not I put the dough in the freezer before baking, but feel free to experiment with this if time allows.  Bake 5 minutes and switch and rotate top and bottom sheets.  Bake 3 minutes more.  Cookies will be tender and they should not be too brown on the bottom.  Immediately transfer to cooling rack—they don’t fall apart as long as you’re gentle.  Feel free to experimenting with cooling on the cookie sheet for desired texture.  Using the method described above, the room temperature cookies are crispy on the bottom and otherwise chewy.  They get crispier as they sit.


This recipe has passed the test for raw, hot out of the oven and room temperature tests. For the brief amount of time these cookies spent in my kitchen (a couple days), they stayed about the same level of chewy/crispy as when they cooled while stored in a semi-airtight container.


Lemon Bundt Cake with Coconut Nests

Recipes

This recipe is a new twist on a family tradition.  This version of the cake was light and a little on the dry side (but by no means unpleasantly dry) with a delightful slightly caramelized outer edge.  A cake like this one made frequent appearances at Easters during my childhood.  One year, the Easter bunny sampled the cake and patched it back together with green coconut.  When I made it this year, Zoie Dog helped herself to a sample when I left the cake too close to the edge of the counter at my sweetie pie’s parent’s house.  (I’m not used to having dogs around any more.)  Lemon frosting and green coconut to the rescue once again!  This cake is great for any special springtime occasion, and when a less fussy dessert is desired, make the icing thinner and drizzle over the cake instead of making nests.  For an even more simple dessert, instead of icing, powdered sugar may also be used for decoration.

Ingredients
Cake
1 ½ cup sugar
2/3 cup vegetable oil
1 can coconut milk (about 14 oz)
1/2 C lemon juice (Juice from 3 -4 lemons or use pure lemon juice that’s not from concentrate)
2 teaspoons vanilla
3 cups flour
2 teaspoons baking powder
1 teaspoon baking soda
1 teaspoon salt

Icing
¼ cup powdered sugar
1 teaspoon lemon juice +more as needed

Nests:
¼ cup Flaked or shredded coconut (I prefer unsweetened)
A couple drops natural food dye
12 or so Vegan jelly beans

Instructions
Coat your Bundt pan with oil and set aside. Preheat oven to 350°F.
Combine the following ingredients in a large bowl: sugar, oil, coconut milk, lemon juice and vanilla. Mix until smooth. Add flour, baking powder, baking soda and salt. Mix until combined. Pour batter into prepared pan and bake for one hour or until cake passes toothpick test. Leave the cake in a pan and cool on a rack or on a bottle. When completely cool, run a knife between cake and pan to loosen, place plate on pan, and invert. Give pan a few taps to release onto plate and remove pan.

Decorations
Put coconut into a small bag. Add a drop of food coloring and shake to mix, adding food coloring drop by drop and shaking between additions until coconut is desired shade of green.
To make icing: add lemon juice to powdered sugar in small bowl. Whisk into a paste so that no chunks remain. Add more lemon juice as needed to make a thick paste. This will act as glue.
Once cake has cooled completely, add a dab of icing and sprinkle the coconut “grass” over the icing, pressing in with a spoon so it sticks. Add another dab of frosting to the coconut nests and add jelly beans—I like to have three per nest.
You can make thinner icing and drizzle this over the cake or simply sprinkle with powdered sugar.


Creamy Sage Pesto Sauce

Recipes

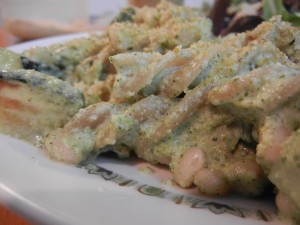
A bounty of sage in our indoor garden inspired a meal using this sauce with whole wheat pasta spirals, zucchini, and pre-soaked and cooked white beans.  While the pasta was boiling, I cooked the zucchini in a pan with a little olive oil and added the white beans, pasta and sauce.  You can also add some Parmesan Replacer on top if you have some around.

Ingredients

1/2 cup hemp seeds
1 cups fresh sage leaves, firmly packed
1/2 cup Italian parsley
1/4 cup garlic (about one small head)
1 teaspoon salt
Juice of one lemon
1 tablespoon nutritional yeast
1/2 cup olive oil

Directions

Process all ingredients except olive oil in food processor until smooth.  Slowly drizzle in olive oil while processor is running.  Process until creamy.  The sauce will be a pastel green color.  Add to pasta or application of your choice.  This sauce tastes pretty good straight from the finger, too.

Zucchini Lasagna Roll Ups

Recipes


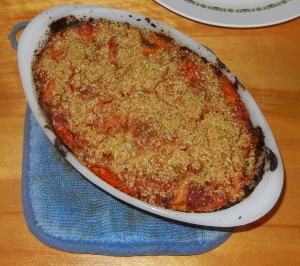
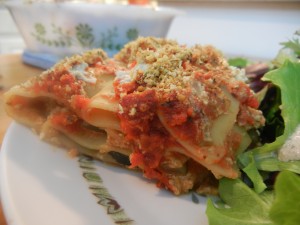
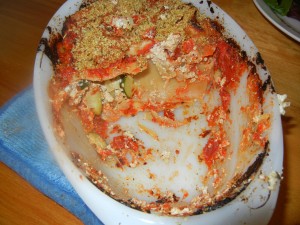
I designed this recipe to use up some ingredients lurking in the fridge and pantry. It turned out looking pretty fancy. I thought it tasted pretty much the same as non-vegan lasagna, but my sweetie pie disagreed. I realized this was probably because I was used to non-fat ricotta cheese. Either way, it’s very tasty and looks impressive.  I’m also proud of the fact that there’s 3 different types of vegan cheese in this dish, all made from scratch.

Ingredients

5 whole-wheat lasagna noodles (cooked to al dente)
2 teaspoons olive oil
2 small zucchinis, chopped
1/4 teaspoon salt
7.5 oz. hemp ricotta cheese
¼ onion, finely diced
Freshly ground black pepper to taste
Pinch ground nutmeg
2 cups tomato sauce (separated) (make your own or from a jar/can)
1/3 cup diced hemp mozzarella cheese
1/8 cup Parmesan replacer


Directions

Cook the pasta and lay the slices out so they will not stick together.
Pan roast the zucchini over medium high heat with the olive oil until lightly browned on all sides. Shock in cold water to stop cooking.
Add zucchini to medium bowl with hemp ricotta, salt, onion, black pepper, and nutmeg.
Pour enough tomato sauce in small casserole dish to cover the bottom.
Spread about 3 tablespoons or so of the filling onto a noodle. Roll it up and place in a small casserole dish. Continue with the rest of the noodles and filling until dish is full. Sprinkle with mozzarella and pour remaining tomato sauce over the top. Cover and bake at 375 for 45 minutes. Uncover, sprinkle with Parmesan replacer and return to oven uncovered for 15 more minutes until top is golden brown.
Let cool in pan slightly before serving.

Parmesan Replacer

Basics, Recipes

Ingredients

1/3 cup panko bread crumbs
1/3 cup nutritional yeast
1/3 cup hemp seeds
2 cloves garlic
1 teaspoon rosemary leaves
1 teaspoon onion powder
½ teaspoon salt (may omit or reduce to taste)


Directions

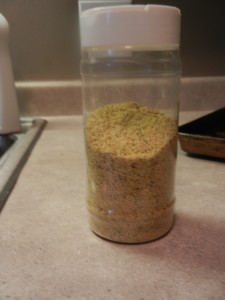
Place all ingredients in food processor.  Pulse until small particle consistency is reached.  Put in sprinkle jar if you have it, refrigerate and use as you would Parmesan cheese.

Hemp Mozzarella

Basics, New Recipes, Recipes

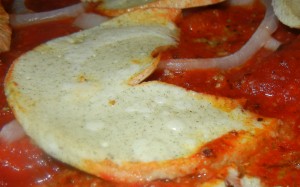
Close up of mozzarella on top of grilled pizza.

This cheese becomes quite creamy when it melts and will brown in the oven.  This version is adapted from the recipe found at Peaceful Plate.

Ingredients

2 cups hemp milk (or other milk of your choice)
2 tablespoons agar agar flakes (I think this could be reduced)
1 teaspoon kosher salt
1 teaspoon nutritional yeast
6 oz hemp tofu (or use silken soy tofu)
a few drops maple syrup
1 drizzle olive oil

Directions

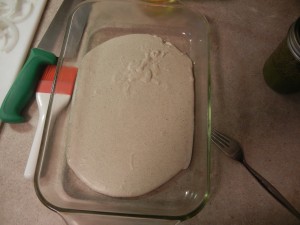
Coat a 9 x 13 glass casserole dish with oil.  Mix the hemp milk, agar, salt and nutritional yeast in a saucepan over medium heat.  Once the mixture reaches a boil, cook at boiling for 10 minutes.  Stir often, to keep from sticking to the bottom of the pan.  In the meantime, put the tofu in the blender with maple syrup and olive oil.  The mixture on the stove will be quite thick.  Pour that mixture into the blender and blend (carefully) until smooth.  Pour mixture from blender into casserole dish.  You can cut the hemp cheese into desired shapes as soon as it is set.  I found that with that amount of agar agar, it sets almost immediately.  You may wish to use less so it will spread out more.  I used the ring from a ball jar to cut out slices for pizza.  You can dice the scraps with a knife for applications that call for shredded mozzarella cheese.  Store unused portion in airtight container in fridge.


The cheese didn't even spread to the corners of the casserole dish. That's why I think it would be ok to reduce the agar agar.