Vegan Food Swap: August

Adventures

Almost as soon as I had the package open, I was munching on some spicy maple pepitas.  As I write this, I’ve been snacking on some spicy roast chick peas (one of my favorites).  I got samples of both in my August swap box.  But by far my favorite treat was the Lake Champlain Chocolates Grace Under Fire chocolate bar with pistachios and red pepper.

I thought it was funny to see the lip balm because just the day before receiving the package I had been bemoaning the fact that I didn’t have any good lip balm.  Lemon Cardamom is a good combo.  I have big plans for the Benito’s hot sauce.  I just may have to try a recipe for cauliflower “hot wings.”  I also like the VerMints (way cute tin).  They might be good for post-hot wing hot mouth, but I’m not convinced they will last until I get around to making the wings.  Oh well.

I’m a little jealous of Rebecca T. of Deeply Rooted since she has access to locally produced awesome vegan chocolate.  She put together a thoughtful and tasty box of treats.

If you’re interested in exchanging care packages with cool vegans from around the country every month, check out Vegan Food Swap. Click the link to find out more and sign up.  You could even try it for just one month if you’re not sure you want to commit to doing it every month.


Sicilian Herb Tomato Dressing

Recipes

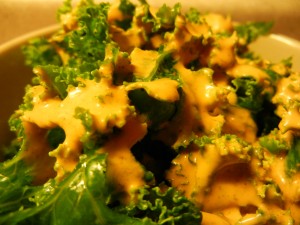
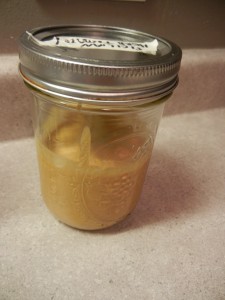
Not only does this slightly creamy dressing add zesty flavor to summer salads, it squeezes even more produce into your diet (and is a good use for any extra tomatoes you want to use up).   This recipe has a kick to it.  You may wish to adjust the spice accordingly.

1 clove garlic
½ teaspoon rubbed sage
½ teaspoon dried basil
½ teaspoon dried oregano
¼ teaspoon very hot red pepper flakes
¼ teaspoon black peppercorns
2 tablespoons olive oil
2 tablespoons hemp oil*
1 tablespoon balsamic vinegar
1 tablespoon lemon juice
½ medium tomato

Put all ingredients into high-power blender and blend until smooth. If you don’t have a high-power blender, make sure the peppercorns are ground and garlic is minced before adding to regular blender or food processor. Pour over salad or use as a veggie dipping sauce.  Come to think of it, it would be good on a sandwich, too.
*If you’re like me and love the taste and health benefits of hemp oil, use 4 tablespoons of hemp oil and omit olive oil.

Gingersnaps

Recipes

This recipe goes back to 2010.  I keep playing with the recipe and have yet to meet a gingersnap I don’t like.  In fact, they don’t always snap.  I’m more of a fan of gingerchews.  The most recent batch disappeared before I got the camera out.

2 1/2 tablespoons ground flaxseeds
3 tablespoons water

3/4 Cup vegetable oil
3/4 Cup maple sugar
1/4 Cup organic sugar
1/4 Cup agave nectar

2 cups flour
2 teaspoon baking soda
1/4 teaspoon salt
1 teaspoon ginger, powdered. or fresh ginger, to taste
1 teaspoon cinnamon, powdered
1/2 teaspoon cloves, powdered

1/3 Cup granulated sugar (to roll dough in)
You can make these cookies in one bowl if you’re careful.  Add water to ground flax in large bowl.  Mix using a whisk or fork. It will become very gooey and gelatinous.  Add vegetable oil, sugars, and agave nectar.  Mix well.

If you are careful, you can add all the dry ingredients on top and gradually stir them in. (Doing it this way
prevents you from getting another bowl dirty, but you have to be careful about mixing thoroughly.  You may wish to combine the dry ingredients separately and add them to the wet ingredients gradually.)

Work dough into a ball and refrigerate it covered in the bowl overnight.  You can cut this time down to 2 hours if you’re feeling impatient.  Form balls of dough (I did walnut-sized), roll in granulated sugar, place on ungreased baking sheet, and press down only enough so that they don’t roll around on the tray (you don’t need to flatten them–they flatten in the oven).  Bake in an oven preheated to 350F for about 8 minutes or until crinkly and golden brown around edges.  If you cool them on a hard surface, they will be chewier, cooling on a wire rack makes for a crispier cookie.  When they are cooled, if you store them in an airtight container, they’ll be crispier, or put them in a regular cookie jar for chewy cookies.  They freeze well.  So well, in fact, that they disappeared before I got around to getting the camera out.  Better luck next time.

I’ve played around with amounts of sugars and oils as well as amounts of spices.  I think the spices can be increased by quite a bit to suit your taste and sugars and oils can be decreased.  They are good with ground cardamom if you have it.  The recipe as shown above produces cookies that spread out quite a bit.  In fact, they ran into each other on the sheet during baking.

French Toast

Recipes

This entry could also be titled, “What to Do with Undercooked Bread,” but this recipe would be great with just about any type of bread.  It is definitely a special event kind of food–a good choice for weekend brunches.  Before I get to the recipe, let me back up and and explain the undercooked sourdough.

Since April, I’ve had some stellar sourdough starter going. I’ve made sourdough starter in the past and it’s never been very vigorous. This stuff is different. I got some free starter from Carl’s Friends (just had to send in a self-addressed, stamped envelope) and it’s been bubbling away ever since.
I’ve made some kind of sourdough bread product approximately once a week. We’re talking pizza dough, injera, sourdough boules, Berkeley sourdough loaves (my favorite keep-on-hand-all-the-time-because-it’s-awesome bread), and I just pulled out some sourdough bahn mi-inspired loaves from the oven. I haven’t posted about this before because I’ve been following other people’s recipes relatively closely and haven’t gotten around to jotting down the changes and pointers that I would make for my own recipe.
But I have been experimenting. I have baked loves in a perforated French bread pan like this one, standard loaf pans, and on a cookie sheet. On the last batch before the bahn mi, I did one loaf on a sheet and one loaf in a loaf pan. We ate the one off the sheet first and saved the loaf in the pan on the counter. When we cut into the second one, we discovered that it was not fully baked along the bottom middle and there was quite a large cavity inside. I decided it would be destined for French toast, which would cook the uncooked part.
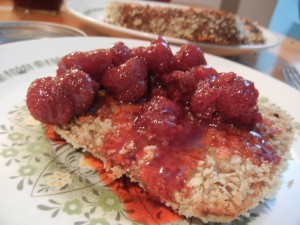
Bread cooked this way will be essentially steamed, a texture that made my sweetie pie think it was still uncooked. I liked it, but I’m a big fan of steamed bread. If you need to rescue your undercooked bread by making French toast and you’ve got very dense bread, I’d suggest slicing it thinly. Here’s how I did it. Strawberry spoon fruit optional. I’d do it on purpose again, for a special treat and since it made so much, I’ll be able to see how it does reheated from frozen.


Coating Ingredients
1 banana
¾ cup hemp milk (or unsweetened milk of your choice)
1 teaspoon cake seasoning
1 teaspoon vanilla
1 tablespoon agave nectar
1 tablespoon flax seeds (doesn’t matter if it’s ground or whole because it’s going in the blender)

Other Ingredients
1 loaf of bread, thinly sliced
2 cups panko crumbs (or as needed)
Oil to coat frying pan.

Optional
Strawberry spoon fruit or other toppings

Blend coating ingredients until smooth. Put enough oil in large flat-bottomed frying pan to coat bottom. Preheat over medium high. Pour some of coating into shallow bowl, replenish as needed. Pour enough panko crumbs into another shallow bowl to cover bottom of bowl, replenish as needed. Dip one slice of bread at a time into coating, flip and make sure it’s covered, let sit about 30 seconds. Remove from coating bowl, let excess drip off, transfer to other bowl and coat with panko. Transfer to large clean plate. Once you have four slices (or however many will fit in your pan) ready, carefully place them in preheated pan. Cook with lid on for 4 minutes per side (or until golden brown). On final side, cook an additional 2 minutes with lid off. Cooking with lid on may not be necessary if you’re not trying to steam undercooked bread.  Serve topped with strawberry spoon fruit.

Coconut Chocolate Ice Cream

Recipes

One of my sweetie pie’s favorite sayings when it comes to vegan food is, “just because it’s vegan, doesn’t mean it’s healthy.” Here’s an example of vegan “junk food” that is mighty tasty.  On the upside, I can easily pronounce all the ingredients in this recipe, so it’s not junk in that sense.

Just out of curiosity, I calculated how much it costs to make this recipe. Turns out it’s about $7.50 for this amount, which I think is about 1.5 quarts, so about $5 per quart, $2.50 per pint. Next time I make it, I’ll be sure to weigh the final product. I used non-organic vanilla extract, but otherwise, it’s all organic. It does take some planning ahead so I have a feeling the organic vegan coconut soft serve at our co-op will still win out occasionally because of the convenience factor, but I like the taste of mine better than the chocolate soft serve at the co-op. Maybe I’ll need to try making plain vanilla sometime so I can do a swirl and perhaps a taste-off.

Ingredients

27 oz. coconut milk (2 cans)
1 cup sugar
½ cup cocoa powder
Pinch salt
1 teaspoon vanilla

If you use an ice cream freezer with a freezable base, it’s a good idea to put your ice cream freezer bowl into the freezer the day before you plan to make ice cream. I know it says it can be ready in 4 hours, but letting it go longer will ensure it’s thoroughly chilled. It doesn’t hurt to let the ice cream base chill for 24 hours in the fridge, either.

Whisk coconut milk, sugar, cocoa powder, and salt together in saucepan over medium heat. Cook about 10 minutes or until it thickens slightly. Remove from heat, add vanilla, and transfer to a glass container to cool. When it reaches room temperature, put in fridge and wait until it’s well chilled. If using a bowl, place plastic wrap directly on surface of base to prevent skin from forming.

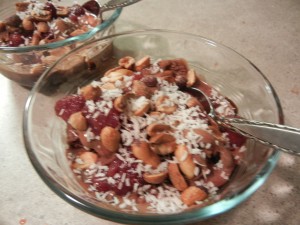
When base is sufficiently cooled, prepare according to ice cream maker directions. It took 30 minutes in mine for melty soft serve consistency and I seasoned it for 2 hours in the freezer until it reached good scooping consistency.  In the picture above, it has fresh roasted peanuts, strawberry spoon fruit, homemade chocolate syrup and coconut flakes.

Review of The Art of Fermentation

Cookbook Reviews, Reviews

Sandor Ellix Katz’s Art of Fermentation; An In-Depth Exploration of Essential Concepts and Processes from Around the World may not be a vegan cookbook, but it does go into detail about how to do many fun vegan projects.  Within the last year or so, I’ve successfully made sourdough, injera, sauerkraut, and some fermented nut cheeses.  I have an attempt at a ginger bug (to make ginger beer) on top of the fridge right now, but for some reason, it’s never bubbled vigorously.  For all you ginger beer experts out there: yes, its organic ginger.

Since recipes/instructions for all the fermented foods I’ve made can be found online and fine-tuned with some experimentation, not everybody may find an encyclopedic book like The Art of Fermentation a necessary addition to their cookbook library.  Nevertheless, if you like having references like this in one handy place, The Art of Fermentation is a relatively complete guide to the processes of fermentation.  It might also be worth checking out from the library (if you can patiently wait your turn on the waiting list–the Hennepin County Library system has 10 copies and 43 requests at the moment) if you plan to set up a tempeh incubator or other such homemade equipment.